


Backing up Windows 11 before a reset, repair, or major update reduces the risk of losing personal files, app data, and important settings. A good backup also makes troubleshooting faster because you can restore what matters instead of starting from scratch.
Why You Should Back Up Before Reset Repair or Update?
Resets and repairs can remove apps, user profiles, and settings depending on the option you choose. Major updates can fail mid way, trigger boot issues, or cause profile corruption, especially if storage is tight or drivers are unstable.
A backup gives you a recovery path if a reset, repair, or update does not go as planned. Before using Windows recovery options, also verify that you can access your BitLocker recovery key if device encryption is enabled, because Windows may require it during recovery.
What to Back Up on Windows 11
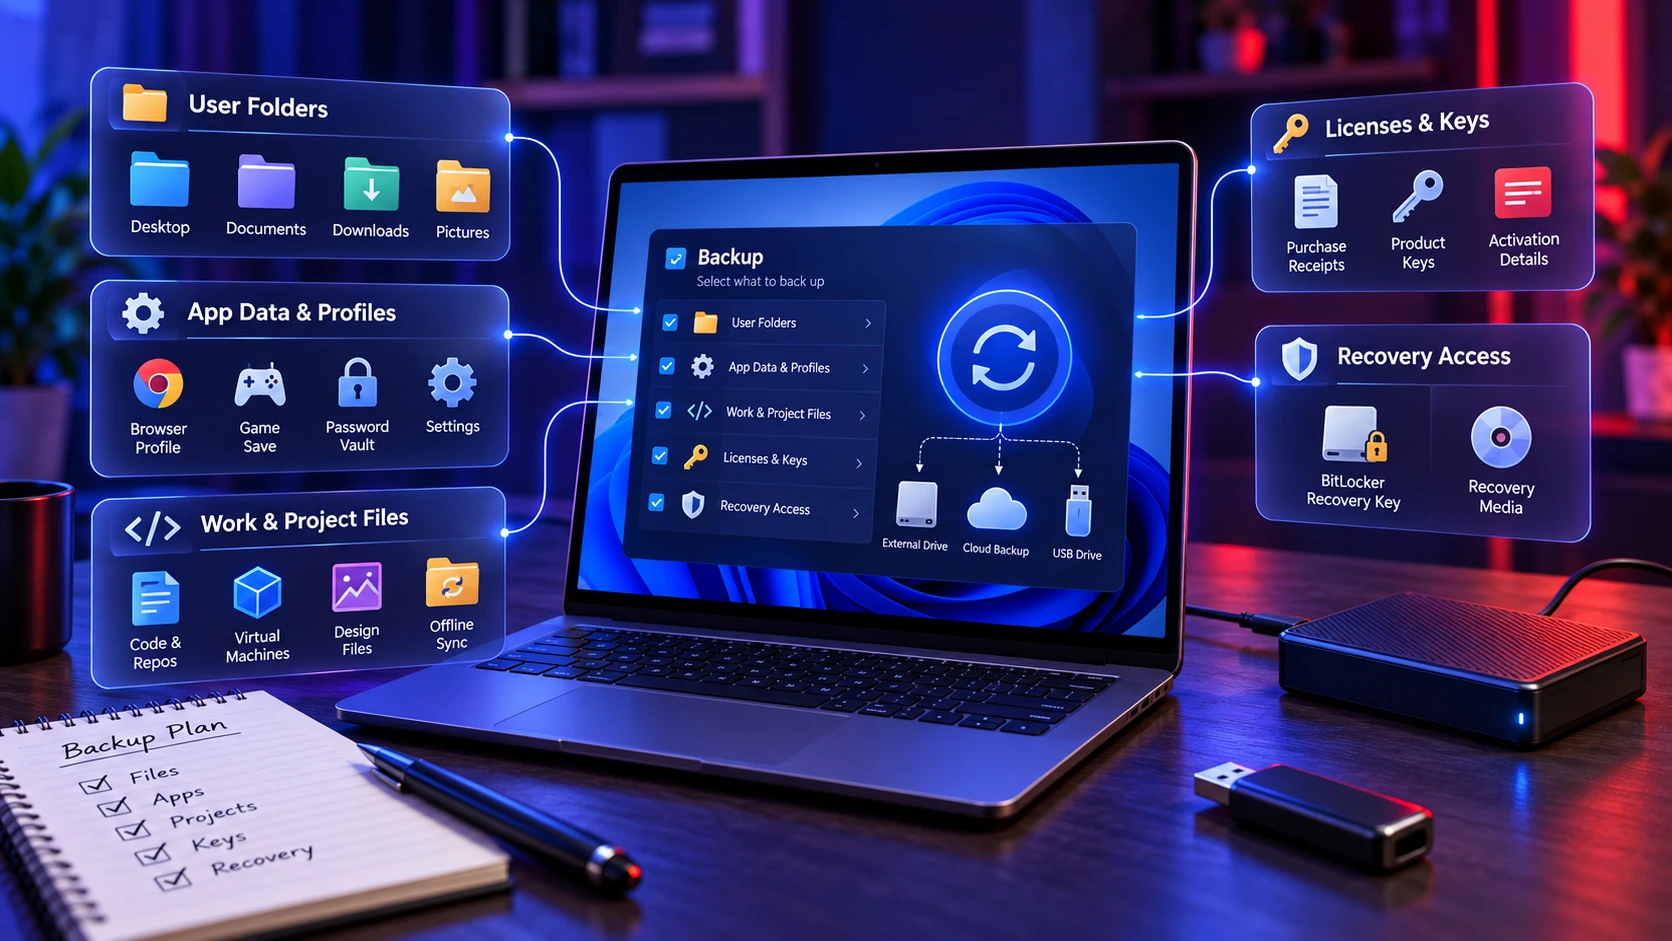
Start by separating personal data from system recovery needs. Most people only copy documents and photos, then realize too late that email archives, bookmarks, and app data were stored elsewhere.
Use this list to decide what to protect based on how you use the PC.
- User Folders: Desktop, Documents, Downloads, Pictures, Videos, and Music.
- App Data And Profiles: Browser profiles, game saves, password vault exports, and app settings stored under AppData.
- Work And Project Files: Local repositories, virtual machines, design files, and offline sync folders.
- Licenses And Keys: Purchase receipts, product keys, and activation details for paid software.
- Recovery Access: Save your BitLocker recovery key if device encryption is enabled, and create recovery media if you want a bootable fallback. Do not treat a restore point as a substitute for a separate personal-file backup.
Once you know what matters, choosing the right method becomes easier.
Choose the Right Backup Method
Windows 11 includes Windows Backup, OneDrive, File History, and several recovery tools. For most users, a practical approach is to keep a verified copy of important files and combine it with cloud or versioned backup. If you specifically need full-disk imaging, use a maintained third-party imaging solution because Microsoft lists the legacy System Image Backup feature as deprecated.
| Backup Method | Best For | What It Protects |
|---|---|---|
| External Drive Backup | Quick safety copy before reset or repair | Personal files and folders you manually copy |
| OneDrive | Cloud backup and access after reinstall | Supported folders and synced files |
| File History | Versioned file backups | Files stored in Windows libraries |
| Windows Backup | Cloud-based recovery of important files and settings | Selected folders, many Windows settings, Wi-Fi information, personalization, and app information |
| Third-Party Disk Imaging | Full-disk recovery when required | Entire disks or selected partitions, depending on the backup software |
For a reset or major update, keep at least one verified copy of important files on storage that will not be reset. Add Windows Backup or File History for easier recovery, and use full-disk imaging only when you specifically need complete disk-level restoration.
Prepare Your PC Before You Start
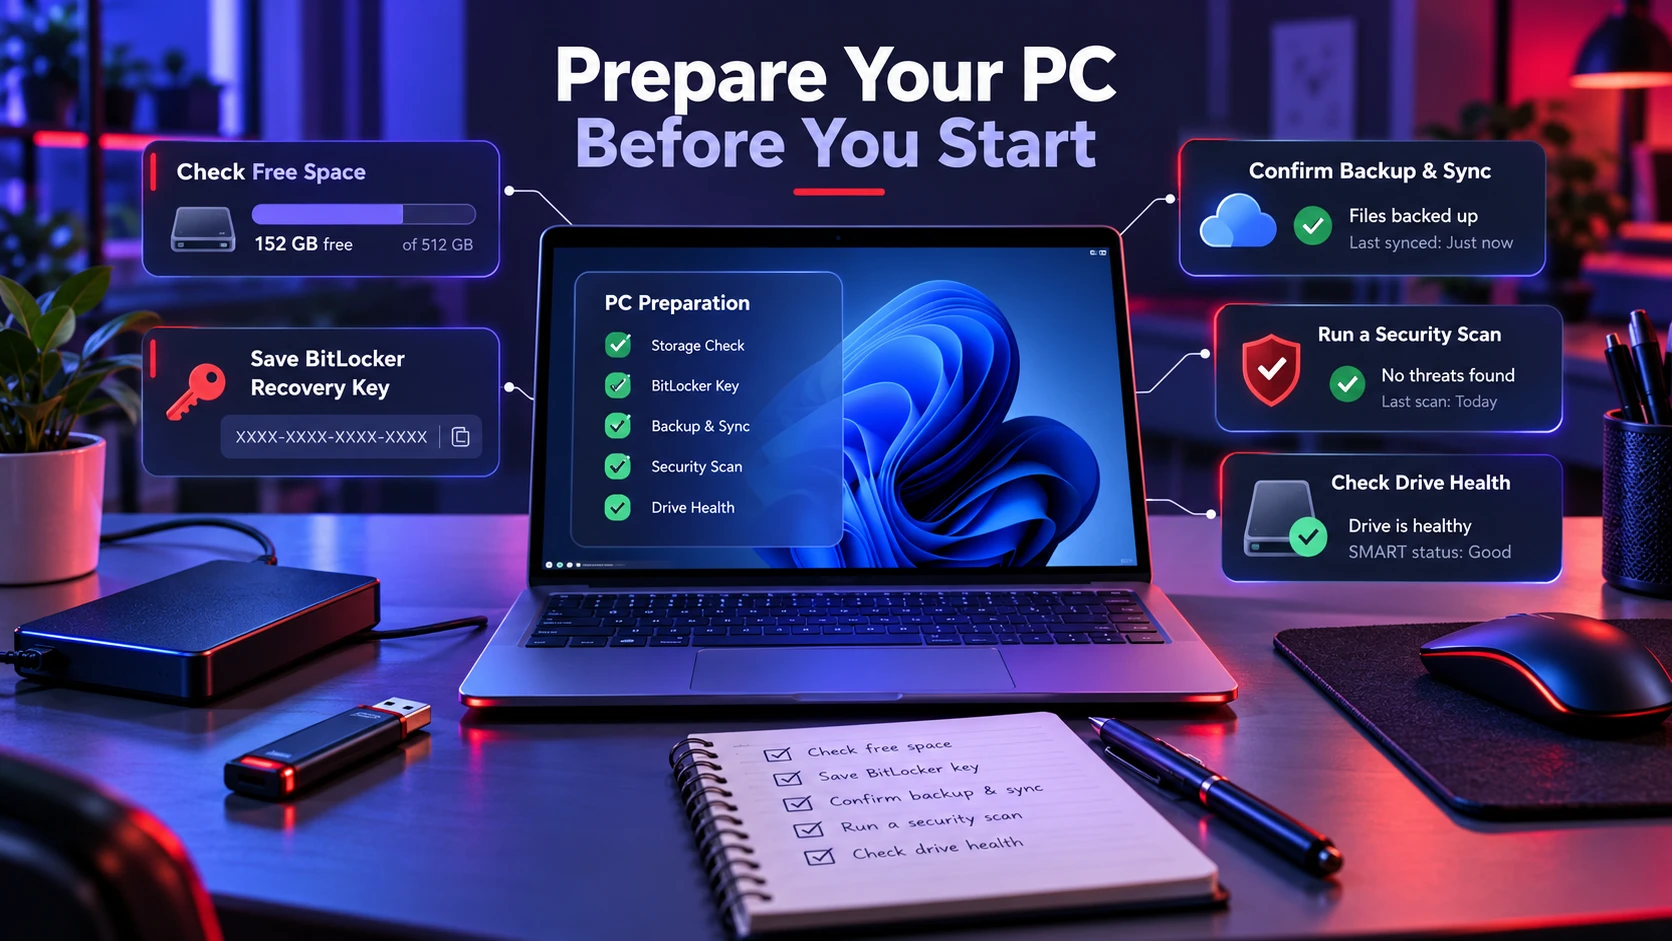
Preparation prevents incomplete backups and failed restores. It also reduces the chance that the reset or update will fail due to low storage or disk errors.
- Check Free Space: Make sure the backup destination has enough capacity for the files you plan to copy.
- Save Your BitLocker Recovery Key: If device encryption or BitLocker is enabled, verify that you can access the recovery key before starting a reset or repair.
- Confirm Backup And Sync Status: Check Windows Backup and OneDrive and make sure important files have finished uploading without sync errors.
- Run A Security Scan: If you suspect malware or unusual system behavior, run a Windows Security scan before copying files.
- Check Drive Health If Needed: If you have experienced read errors, freezes, storage warnings, or failed updates, check the system drive’s health before starting a large backup or reset.
After this, move on to a file backup that you can verify quickly.
Back Up Personal Files to An External Drive
An external SSD or HDD is one of the simplest ways to create a quick safety copy before making major Windows changes. After verifying that the copied files open correctly, disconnect the drive before starting the reset or repair so the backup remains separate from the PC being modified.
- Connect The Drive: Plug in the external drive and confirm it shows up in File Explorer.
- Create A Backup Folder: Make a single folder with a clear name so you do not scatter files.
- Copy User Folders: Copy Desktop Documents Downloads Pictures Videos and any custom project folders you use.
- Export Browser Data: Export bookmarks and save important tabs or reading lists using the browser sync or export feature.
- Verify Random Files: Open a handful of documents and photos from the external drive to confirm the copy is usable.
This method is reliable, but it does not capture Windows settings or installed apps, so consider adding a system image for full rollback.
Use OneDrive for Cloud Backup
OneDrive can protect common folders and make them available after a reinstall. It is best when you want ongoing protection rather than a one time snapshot. If your OneDrive storage is too limited for your files, you can compare cloud storage options before deciding which service should hold your secondary copy.
Confirm that sync is complete before you reset or update. A quick way is to check the OneDrive status and ensure there are no pending uploads or sync errors.
- Turn On Folder Backup: Enable backup for Desktop Documents and Pictures if you rely on those folders.
- Confirm Storage Limits: Check available OneDrive space so large photo or video collections do not stall.
- Keep A Local Copy Too: Pair OneDrive with an external drive for extra resilience.
Cloud sync is convenient, but it is not a full system recovery tool.
Turn on File History for Versioned Backups
File History keeps multiple versions of files so you can roll back if something is overwritten or corrupted. It works best with an external drive that remains connected during regular use.
- Connect A Dedicated Drive: Use a drive that you do not also use for random storage to avoid clutter.
- Enable File History: Open Control Panel > System and Security > File History. Select the external drive or network location you want to use, then choose Turn on.
- Include Needed Folders: File History backs up Windows libraries. If an important folder is stored elsewhere, add it to an existing library so File History includes it.
- Run An Initial Backup: Let the first run finish before starting a reset or update.
Once enabled, it gives you an extra safety net beyond a single copy.
Create A Full System Image Backup
A system image captures the entire Windows 11 installation, including settings, apps, drivers, and the exact state of the disk. It is the fastest way to recover from a failed repair or update when you cannot boot normally.
This approach requires significant space, and restoring it will overwrite the target drive. Use it when you want a true roll back option rather than just file recovery.
- Choose A Storage Target: Use a large external drive with plenty of free space.
- Create The Image: Use the system image feature available in Windows backup tools to create an image of the system drive.
- Make A Recovery Drive: Create a USB recovery drive so you can access restore options if the PC will not boot.
- Test Boot Options: Confirm you can reach recovery tools, so you are not learning during an emergency.
This adds confidence before risky changes such as repair installs or major feature updates.
Back Up Drivers and Device Specific Settings
Windows Backup is the current built-in Windows option for backing up selected folders and remembering many Windows settings, apps, Wi-Fi information, and personalization preferences. Folder backup uses OneDrive, so confirm that you have enough cloud storage and that backup status is complete before resetting or repairing the PC.
- Open Windows Backup: Open Start, type ‘Windows Backup,’ and select the Windows Backup app.
- Review Your Folders: Choose which supported user folders you want backed up through OneDrive.
- Review Apps And Settings: Check the options for apps, accounts, Wi-Fi information, personalization, language preferences, and other Windows settings.
- Confirm Backup Status: Select Back up where available and verify that Windows Backup shows the required items as backed up.
This step is small, but it can save hours when the system comes back up.
Verify Your Backup Before You Reset or Update
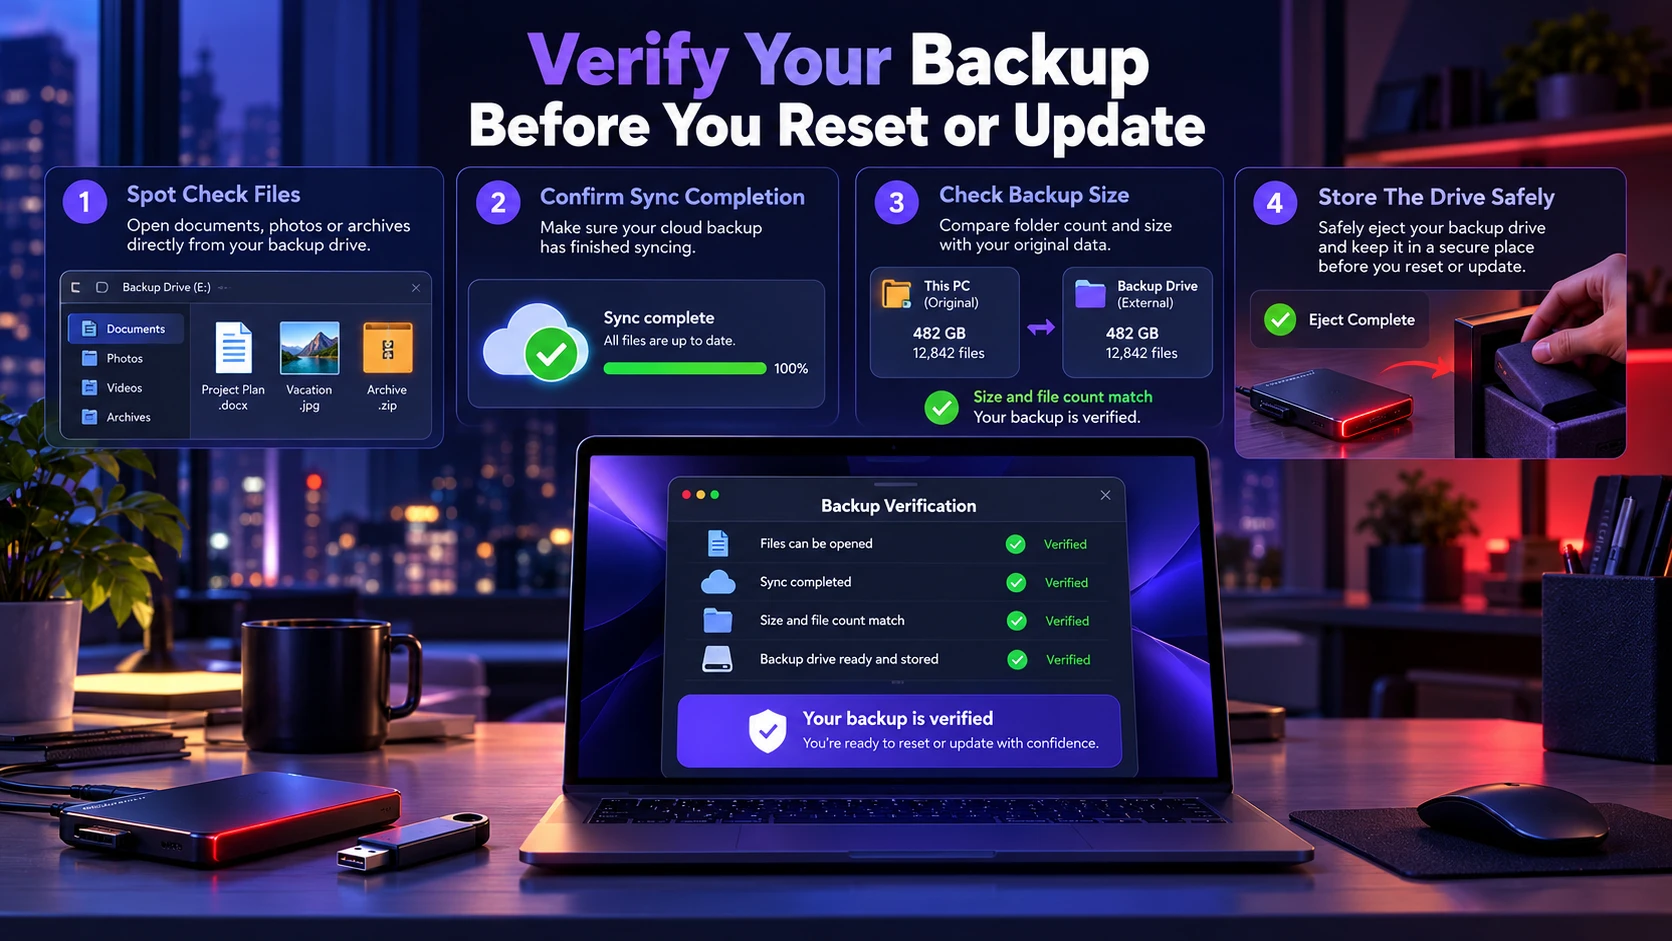
A backup that cannot be restored is not a backup. Verification should be quick, targeted, and focused on the items that would be painful to lose.
- Spot Check Files: Open documents, photos, and archives directly from the backup destination.
- Confirm Sync Completion: Ensure OneDrive shows all files are up to date and no errors remain.
- Check Backup Size: Compare folder sizes and counts so missing directories do not slip through.
- Store The Drive Safely: Disconnect external backups before starting a reset or repair to avoid accidental formatting.
After verification, you can proceed knowing you can recover if something goes wrong.
Common Mistakes That Cause Data Loss
Most backup failures come from missing hidden folders, relying on sync that is not finished, or saving everything to the same drive being reset. These issues are preventable with a simple checklist.
- Backing Up To The Same Drive: A reset can wipe the same disk that contains your backup.
- Ignoring AppData: Some apps store critical settings and local databases outside Documents.
- Assuming Sync Means Backup: Sync can propagate deletions, so keep a separate copy for important files.
- Not Saving Keys: Missing license keys can block reinstalling paid tools after a reset.
A careful plan prevents rushed decisions right before a repair or update.
Conclusion
To back up Windows 11 before a reset, repair, or major update, start with a clean file copy to an external drive and confirm it opens correctly. Add OneDrive or File History for ongoing protection, then create a system image when you want a complete rollback path.
Once your backups are verified and stored safely, you can proceed with maintenance confidently and recover quickly if Windows does not return as expected.
After a reset or reinstall, it is also worth reviewing your Windows 11 privacy settings before reconnecting every app and cloud service.
Frequently Asked Questions
Is OneDrive Enough to Back Up Windows 11 Before a Reset?
OneDrive is strong for protecting synced folders like Desktop, Documents, and Pictures, but it does not capture installed apps and full system settings. Pair it with an external drive copy or a system image when you need full recovery options.
What is the Safest Backup to Do Before a Major Windows 11 Update?
A layered backup is safest, with a file backup for personal data and a system image for fast rollback. This combination covers both everyday file recovery and worst case boot or update failures.
Will Resetting Windows 11 Delete Everything Even If I Choose Keep My Files?
Keep my files reinstalls Windows while preserving your personal files, but it removes installed apps and resets Windows settings. Back up important files before starting the reset anyway, and make sure you can access your BitLocker recovery key if device encryption is enabled.